
Why a Wall Wrap Installation Guide Matters for Your Next Project
A wall wrap installation guide is your roadmap to changing any space with stunning graphics, avoiding the cost and mess of paint or construction. Understanding the process helps you decide between DIY and professional installation and ensures you get the results you’re paying for.
Quick Answer: Essential Steps for Wall Wrap Installation
- Prepare the surface – Clean, repair, prime, and paint the wall.
- Gather your tools – Squeegee, level, utility knife, heat gun, cleaning supplies.
- Acclimate the material – Let vinyl reach room temperature for 2+ hours.
- Apply the first panel – Use a plumb line, peel backing gradually, squeegee from the center out.
- Handle seams carefully – Overlap by at least 1/2″ or use a double-cut method.
- Trim and finish – Cut excess with a sharp blade and seal all edges.
According to industry research, improperly installed wall wraps can lose up to 30% of their adhesion, primarily due to rushed surface prep. The difference between a wrap that lasts 2 years versus 10 often comes down to following these steps.
Wall wraps are versatile and removable, working on drywall, wood, glass, and metal. This makes them ideal for renters or temporary branding. However, installation requires patience, especially around outlets and corners. This guide breaks down every step, using lessons from professional installers to help you avoid common mistakes and know when to call in the pros.

At Florida Car Wrap, we’ve seen the magic of a well-installed wall wrap in retail spaces and offices from Fort Lauderdale to Miami. We believe in empowering our clients with knowledge, so let’s dive in. You can find more information about how wall wraps can transform your space on our site: More info about wall wraps.
Gearing Up: Essential Tools and Materials
Before you begin, gathering your tools will make the installation process smoother. Having everything within arm’s reach is key to a professional result.

- Felt-wrapped squeegee: Essential for smoothing vinyl and removing bubbles without scratching the graphic.
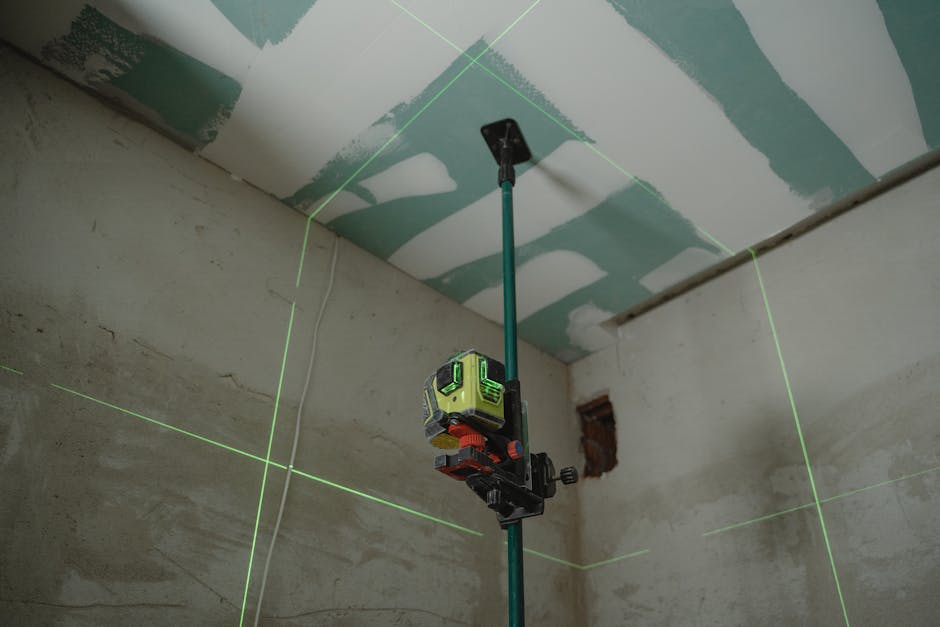
- Level: A laser or bubble level is crucial for ensuring your first panel is perfectly straight. A crooked start will affect the entire project.
- Tape measure & Masking tape: For accurate measurements and temporarily positioning panels before final application.
- Utility knife: Use a sharp knife with plenty of fresh blades. A dull blade will tear the vinyl and create messy edges.
- Heat gun: Useful for conforming vinyl around curves and post-heating edges for better adhesion.
- Surface prep supplies: You’ll need spackle to fill holes, fine-grit sandpaper to smooth patches, and a mold-inhibiting primer.
- Cleaning supplies: Lint-free microfiber cloths, isopropyl alcohol, and a water spray bottle are needed for the final wall cleaning.
- Moisture meter: Especially important in humid climates like South Florida, as excess moisture can cause adhesion failure.
- Lead pencil: For marking your alignment lines.
This wall wrap installation guide emphasizes preparation because it’s half the battle for a successful, long-lasting installation.
Step 1: The Perfect Canvas – Preparing Your Wall
The final look of your wall wrap depends entirely on proper wall preparation. It’s the most critical step in this wall wrap installation guide and what separates a professional-looking wrap from one that fails prematurely.
Choosing and Inspecting Your Surface
First, choose the right wall. High-traffic areas with good lighting, like lobbies or conference rooms, maximize your wrap’s impact. Avoid walls near heaters or in high-humidity areas, as heat and moisture are enemies of vinyl adhesive. The wall and room temperature should be at least 65°F (18°C) during and for 48 hours after installation.
Next, inspect the wall closely. Look for cracks, holes, or peeling paint. Run your hand over it to feel for bumps. Wall wraps will highlight imperfections, not hide them. In a humid climate like South Florida, checking for moisture is non-negotiable. Use a moisture meter; the wall’s moisture content should not exceed 4%. If it’s higher, you must find and fix the source before proceeding.
Repair, Prime, and Paint for Perfect Adhesion
Now, create a flawless surface. Fill every crack and hole with spackle, let it dry for 24 hours, then sand it smooth. Wipe away all dust.
Priming is a step you cannot skip. Use a quality mold-inhibiting primer designed for vinyl applications to ensure strong adhesion and clean removal later. Avoid oil-based primers, which can damage vinyl.
After priming, a coat of semi-gloss paint creates the ideal smooth surface for vinyl. The most important part is patience: fresh paint must cure for at least 72 hours (a full week is even better) before you apply the wrap. Rushing this step is a primary cause of adhesion failure.
The Final Clean
Even a wall that looks clean can have invisible contaminants like dust or oils. For the final cleaning, mix a solution of 50/50 isopropyl alcohol (IPA) and water in a spray bottle.
Spray the wall in sections and wipe it down with a clean, lint-free microfiber cloth. Pay extra attention to areas around switches and door frames. Finally, let the wall dry completely (about 15-30 minutes). Any remaining moisture will prevent the adhesive from bonding properly. This final step is your insurance policy for a long-lasting wrap.
Step 2: The Ultimate Wall Wrap Installation Guide
With the prep work done, it’s time for the most exciting part of this wall wrap installation guide: applying the vinyl. This is where patience and precision come together to create a stunning visual.

Acclimating and Measuring Your Wrap
Vinyl reacts to its environment. Before you begin, unroll the material and lay it flat in the installation room for at least 2 hours to let it acclimate to the temperature. For freshly printed graphics, allowing 48 hours is even better. This prevents the vinyl from curling or lifting after installation.
While it acclimates, measure your wall’s height and width in several places. Confirm your graphic panels are sized correctly and include extra material (bleed) for trimming. For multi-panel designs, plan your layout. Starting with the center panel often works best, as it allows any minor drift to spread evenly to the edges.
Applying the First Panel: Your Step-by-Step Wall Wrap Installation Guide
The first panel sets the standard for the entire project.
- Create a plumb line. Use a laser or traditional level to mark a perfectly vertical line for alignment.
- Prepare the panel. Roll the panel with the graphic facing inward. Unroll and peel back about 6 inches of the liner from the top, then cut that piece of liner away. This exposes the adhesive at the top while keeping the rest of the panel protected.
- Position the panel. Carefully align the exposed adhesive edge with your plumb line, allowing for overhang at the top. Apply the vinyl with minimal tension to avoid stretching, which causes shrinking and lifting later.
- Squeegee the vinyl. Once aligned, press the top section to the wall. Using your felt-wrapped squeegee, smooth the vinyl with firm, overlapping strokes starting from the center and working outward. This pushes air bubbles to the edges.
- Continue down the wall. Gradually peel away more of the backing liner as you work your way down, continuing the center-out squeegee motion. Ensure the edges are pressed down firmly.
Handling Seams and Working Around Obstacles

For multi-panel installations, an overlap of ½” to ¾” is recommended. Butt seams (edge-to-edge) are risky, as vinyl can shrink over time and create gaps. For a virtually invisible seam, use the overlap double-cut method:
- Apply the second panel, overlapping the first by about 2 inches.
- Place a strip of masking tape over the seam to protect the vinyl.
- Using a straightedge and a sharp utility knife, cut through both layers down the middle of the overlap.
- Remove the tape and the two thin excess strips of vinyl. The result is a perfect, seamless join.
For obstacles like outlets and switches, first turn off the power and remove the cover plates. Apply the wrap over the opening, then make a small “X” cut from the center to the corners of the box. Trim the excess vinyl, tucking it slightly inside the opening. The cover plate will hide the cuts. For windows and doors, apply the wrap over the frame, make diagonal cuts to the corners, and trim the excess, leaving about ¼” to tuck behind the trim for a clean finish.
Common Mistakes and Pro-Level Finishing Touches
Even professionals learn from every project. This part of our wall wrap installation guide covers common pitfalls and the finishing touches that lift your work from good to great.
Mistakes to Avoid During Installation
- Stretching the vinyl: Vinyl has memory and will shrink back if stretched, causing lifting edges and bubbles. Apply it with minimal tension.
- Rushing surface preparation: Invisible dust, grease, or moisture will ruin adhesion. The time spent on proper prep is an investment in the wrap’s longevity.
- Trapping air bubbles: This happens from moving too fast or using improper squeegee technique. Always work from the center out with firm, overlapping strokes.
- Using a dull utility knife: A dull blade tears vinyl and creates jagged edges. Change blades frequently.
- Incorrect squeegee pressure: Too much pressure can scratch the graphic; too little won’t create a strong bond. Use firm, even pressure.
- Rushing the process: Patience is key. Take your time with measurements, alignment, and trimming for a professional result.
Pro-Tips for a Flawless Finish
- Fixing bubbles: For a stubborn bubble, make a tiny puncture in its center with a pin or needle, then gently squeegee the air out through the hole. The puncture will be invisible.
- Using heat: A gentle, brief application of low heat from a heat gun on edges and corners after installation can help the vinyl conform and improve adhesion. Be careful not to overheat and melt the material.
- Trimming: For clean perimeter cuts, use a sharp blade and a straightedge. Work slowly and step back periodically to check your alignment from a distance.
- Cleaning residue: If any adhesive gets on the wrap’s surface, gently wipe it away with a soft cloth and a mild isopropyl alcohol solution.
How to Repair Damaged Wall Wraps
Accidents happen, but minor damage is often repairable.
- Small tears or holes: Use an inlay repair. Cut a patch from leftover material that is slightly larger than the damage. Place it over the damaged area, aligning the pattern. Using a straightedge, cut through both the patch and the underlying wrap. Remove the damaged section and apply your perfectly matched patch.
- Large damage: For severely compromised panels, it’s best to replace the entire section. A heat gun can help loosen the adhesive for removal. Clean the wall surface again before installing the new panel.
Addressing damage promptly prevents bigger issues down the line and keeps your wrap looking its best for years.
Frequently Asked Questions about Wall Wraps
Here are answers to the most common questions we get from clients in Davie, Fort Lauderdale, and Miami about their first wall wrap installation guide project.
Can I install a wall wrap on a textured surface?
Unfortunately, no. Self-adhesive vinyl requires a smooth, non-porous surface to create a complete bond. On textured walls (including textured paint, brick, or cinder block), the adhesive only sticks to the high points, leading to bubbles, lifting edges, and an unsightly finish where the texture shows through.
The solution is to create a smooth surface first. This typically involves applying a skim coat of joint compound, sanding it smooth, then priming and painting. While it’s extra work, it’s necessary for a successful installation. If you’re unsure, test a small sample piece first.
How do I clean and maintain my installed wall wrap?
Maintaining your wall wrap is incredibly easy. For regular cleaning, simply wipe the surface with a soft, lint-free cloth and warm, soapy water (using a mild dish soap).
Avoid abrasive cleaners, scouring pads, strong solvents, or harsh chemicals, as they can scratch the surface, cause discoloration, or damage the vinyl. For a tougher spot, you can use a mild household cleaner, but always test it on an inconspicuous area first and rinse it off with clean water immediately after. With proper care, an indoor wall wrap can last up to 10 years.
How do you remove a wall wrap without damaging the paint?
One of the best features of wall wraps is their removability, especially if the wall was properly prepared before installation.
- Start at a corner. Gently lift one of the top corners of the wrap.
- Apply gentle heat. Using a heat gun on a low setting (or a hairdryer) can soften the adhesive and make removal easier. Keep the heat gun moving to avoid overheating one spot.
- Peel slowly. The key is to pull the vinyl back on itself at a shallow angle (around 15-20 degrees). Pulling slowly and steadily, close to the wall, prevents tearing and minimizes adhesive residue.
- Clean up. If any minor adhesive residue is left behind, it can be easily removed with a specialty adhesive remover or an isopropyl alcohol solution and a clean cloth.
If you followed the prep steps in this guide, the wrap should come off cleanly without damaging the underlying paint or drywall. For more on removal, the principles in our The Ultimate Guide to Vinyl Wrap Removal are also helpful here.
Conclusion: Enjoy Your Transformed Space
You’ve made it through our complete wall wrap installation guide and are now equipped with the knowledge to transform your space. You understand that proper surface preparation is the foundation of a lasting wrap and that patience during application leads to professional results.
A well-installed wall wrap is a cost-effective, high-impact alternative to traditional renovation, perfect for reinforcing your brand in a Fort Lauderdale business or adding personality to a Davie home without the mess or permanent commitment.
While many projects are achievable with a DIY approach, there’s no shame in opting for a professional touch. At Florida Car Wrap, we’ve been doing this for over 20 years. Our founder, Steve Hargittai, and his team have tackled every type of project, ensuring stunning results every time. Our business is built on high-quality standards and a 100% client satisfaction guarantee, with clear communication and support from start to finish. If a problem ever arises, you can count on us to make it right.
Ready to transform your space? Whether you plan to do it yourself or want our experienced team to handle it, we’re here to help. Get a quote for your custom wall wrap project and let’s create something extraordinary together!


